Overview
This guide will walk you through installing a BLTouch to an Ender 3 that has already been converted to a Fly-E3 STM32 board.
Hardware Requirements
1 x BLTouch - An official BLTouch is recommended over a clone as clones generally have poor repeatability. 2 x M3 Screws 2 x M3 Nuts 1m minimum of 5 wire ribbon cable , such as this. It is also possible to buy the BLTouch with an extension kit. 1 x Dupont Connector Kit or if you don’t have a suitable crimper. This is required if making your own cable.
Mounting the BLTouch
Before you undertake the actual installation of the BLTouch, you will need to print a mount.
The mount used within this instruction is this one.
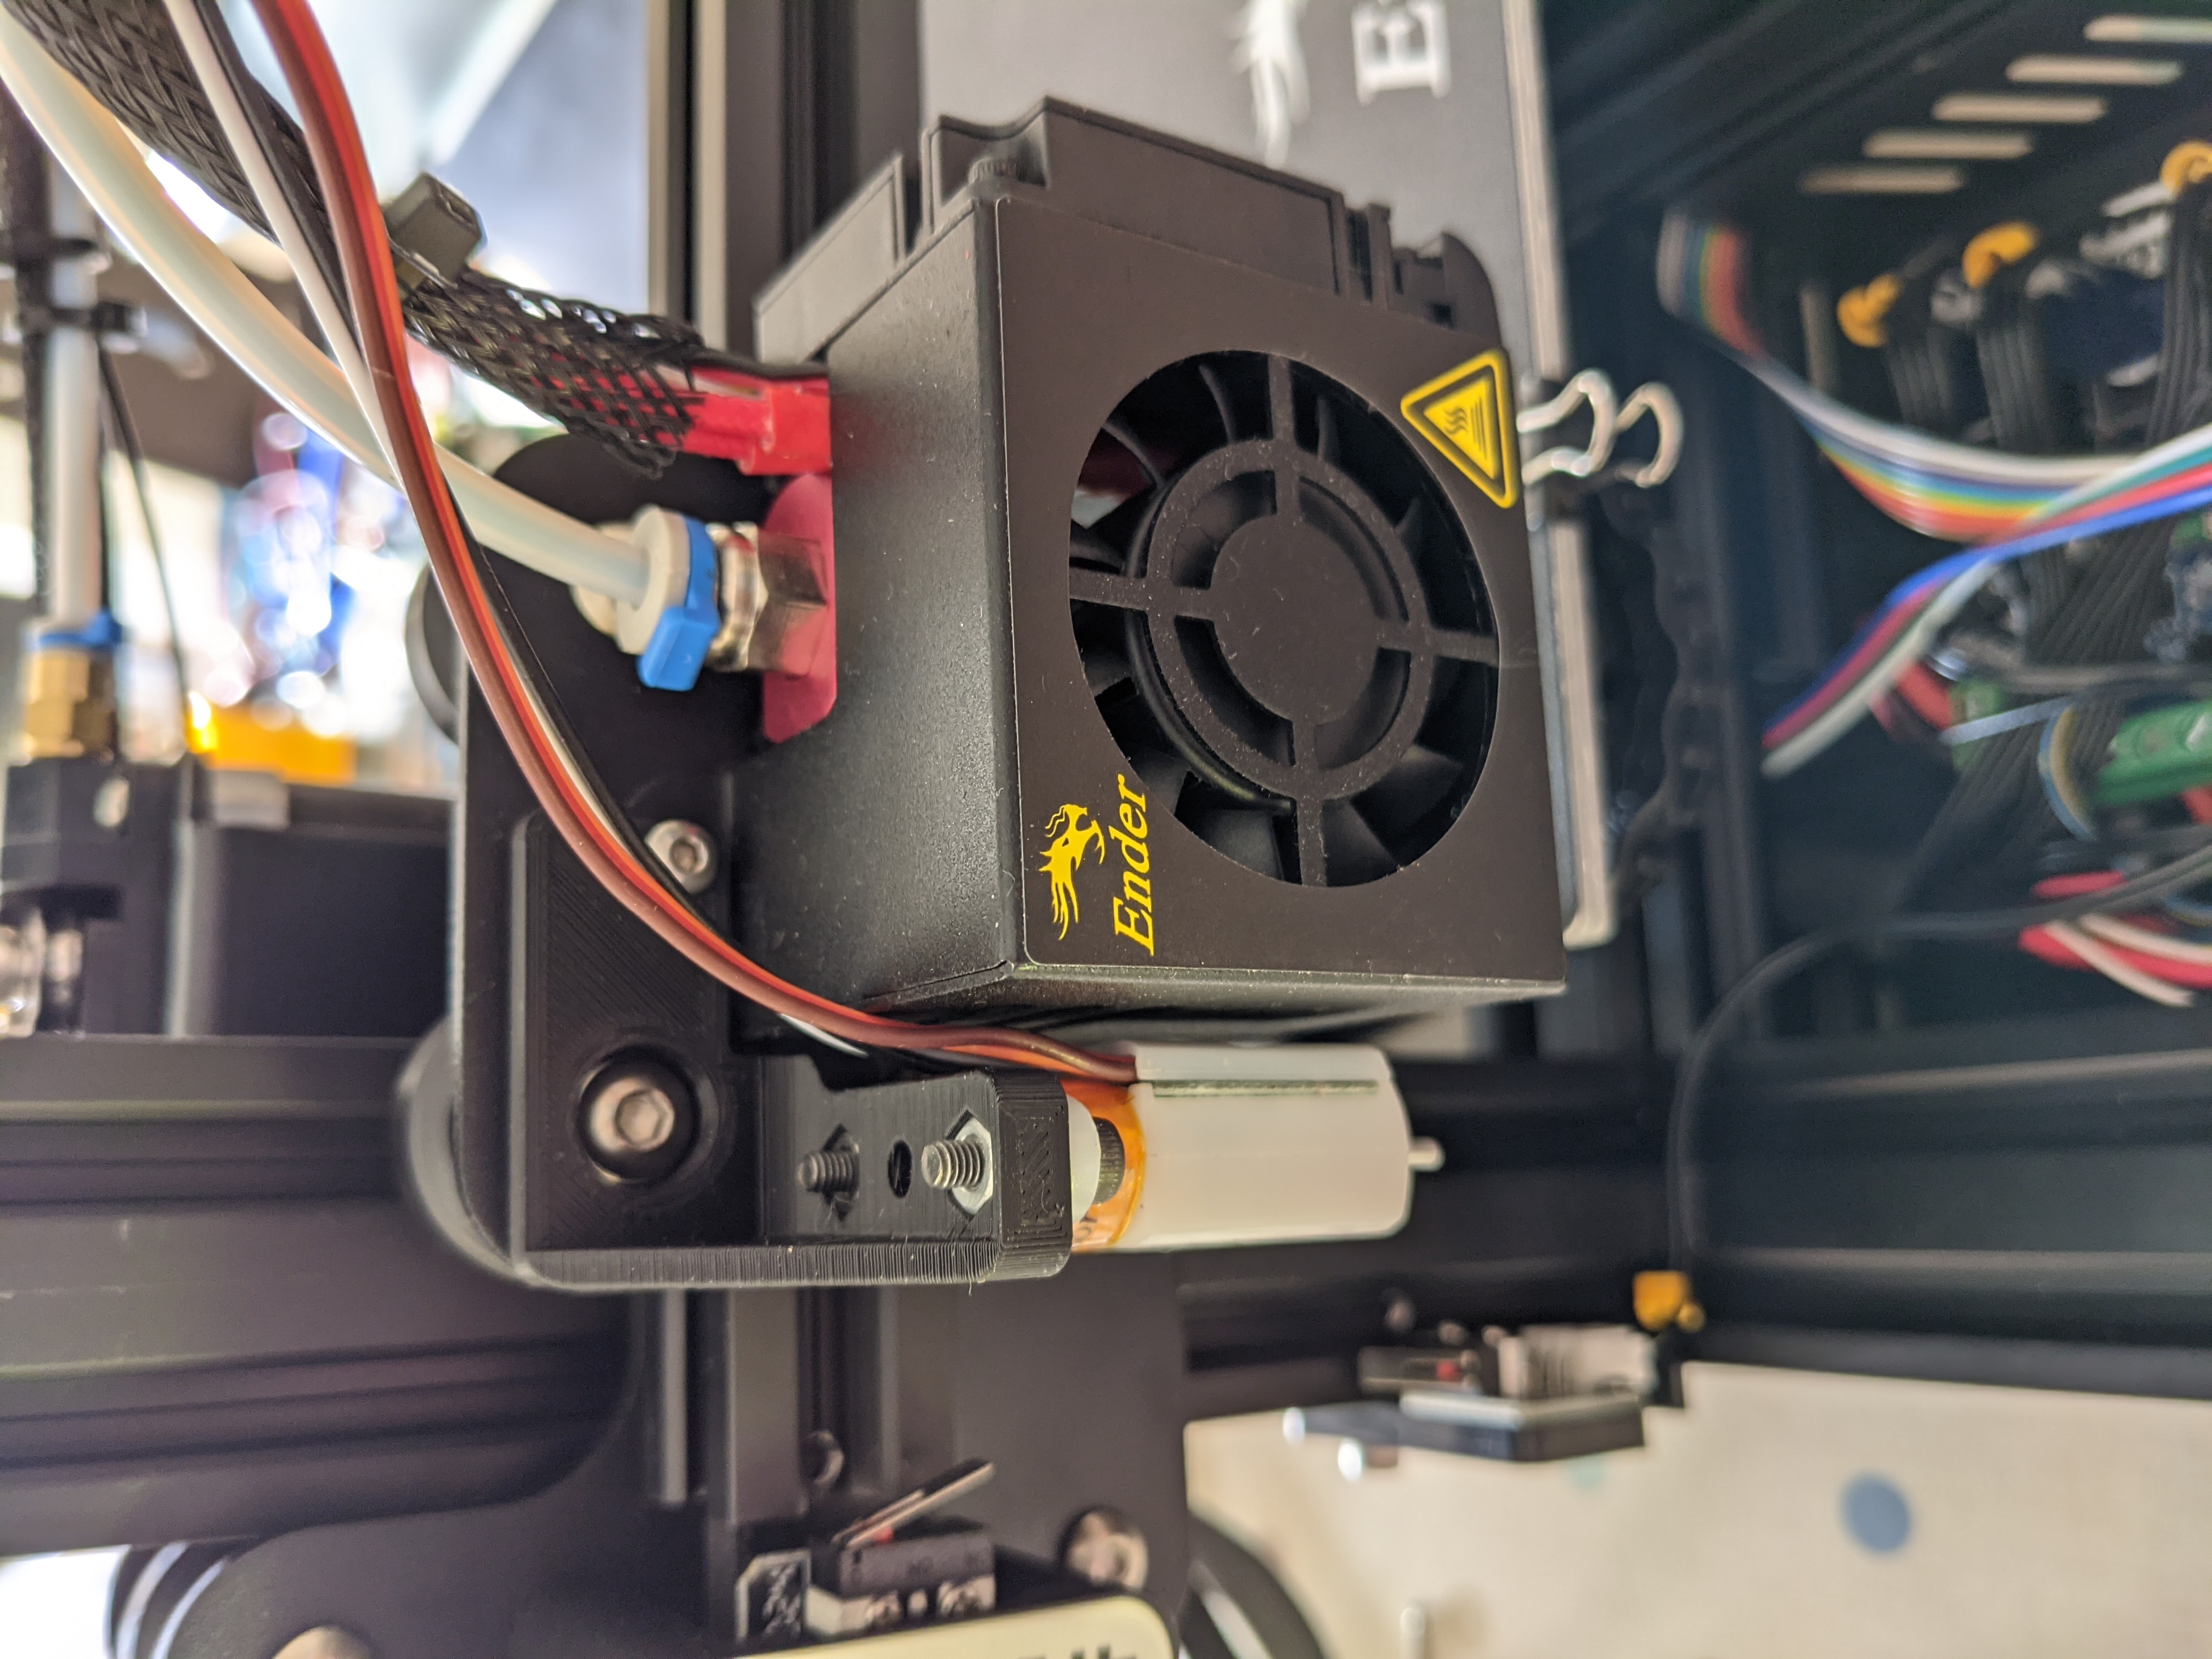
Remove the two screws securing the fan cage to the X carriage.
Attach the BLTouch mount to the X carriage, as shown below.

Then secure the BLTouch to the mount as shown below.
Wiring
The cable
The BLTouch has 5 cables to control it. 3 for the servo and 2 for the endstop.
The cable needs to be extended to fit this printer. If you have purchased the extension cable, you can skip this bit.
If making your own cable, it is suggested to use female dupont connectors on one end and male dupont connectors on the other. Don’t put the male end on until you have measured the cable length.
Connecting the cable to the BLTouch
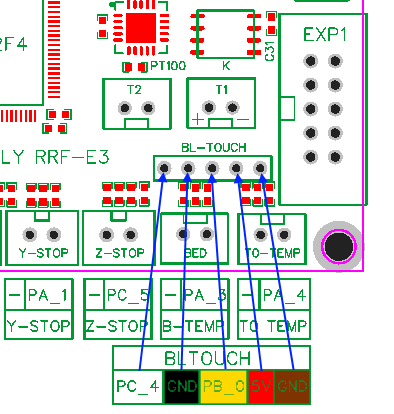
To make it easier when connecting the cable to the board, the black cable on the probe connector should be next to the yellow connector of the servo cable. To confirm, the colour order of the BLTouch cables should be white, black, yellow, red and brown.
Cable organisation
You can either feed the cable through the existing cable management mesh or cable tie the cable to the outside. Then feed the cable through the back of the case with the others.
Connecting the cable to the Fly-E3
The cable should be connected to the Fly-E3 as shown below.
Other changes
The Z axis endstop can be removed as it is no longer required for the printer to function.
Config Changes
If this is the first time you have set up the Ender 3 with the Fly-E3 board, a pre-configured config is available here.
Otherwise follow the information on the Fly-E3 BLTouch Page for the items to change in your config.
Wrap up
Your Z Probe trigger height will have to be measured.
There is a macro here, that can be used. If using this one, make sure your hotend and bed are up to temperature and levelled before measuring the trigger height. Once you’ve worked out your average, change the Z value in G31, remembering that RRF uses a positive value.
If not using the macro, use the instructions found here