Overview
The BTT Octopus Pro v1.0 F429 Version has support for PT100 and PT1000.
Board Setup
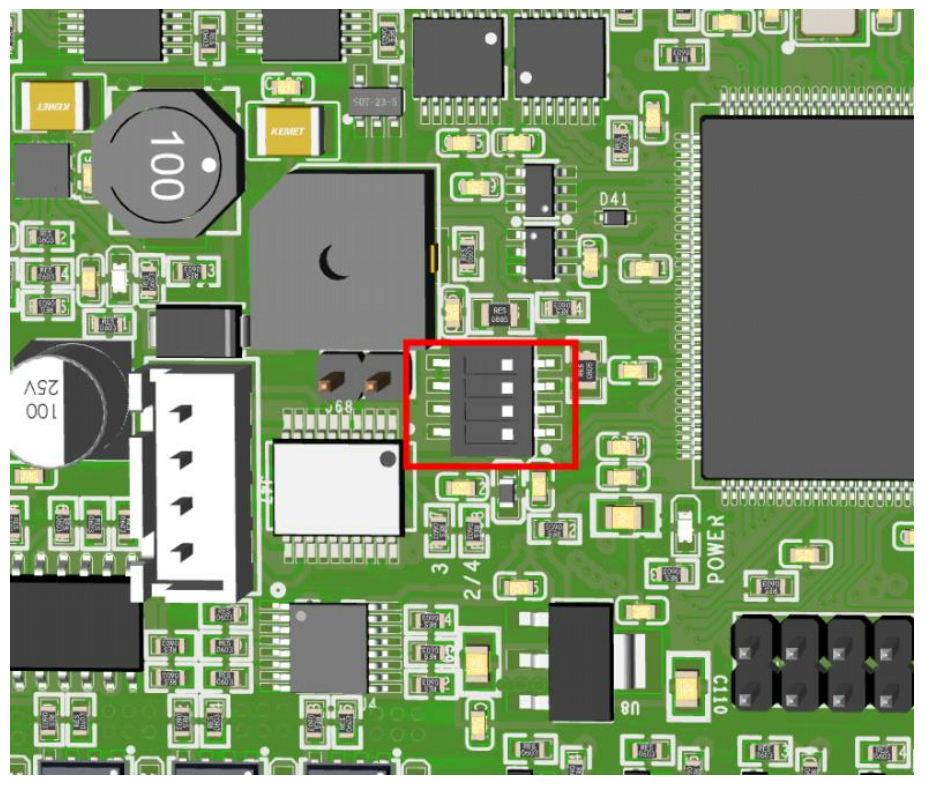
The BTT Octopus Pro v1.0 F429 Version has a series of dip switches that must be set when using 2, 3 and 4 wire PT100 and PT1000.

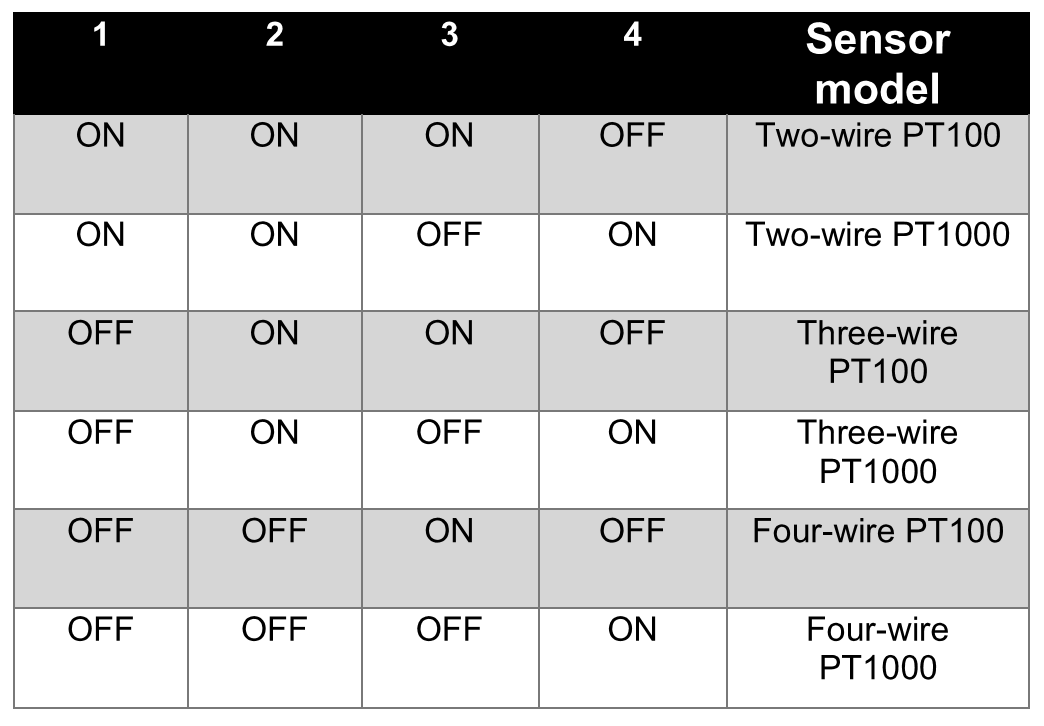
The dip switches should be set as shown in the table below.

PT100 3 Wire
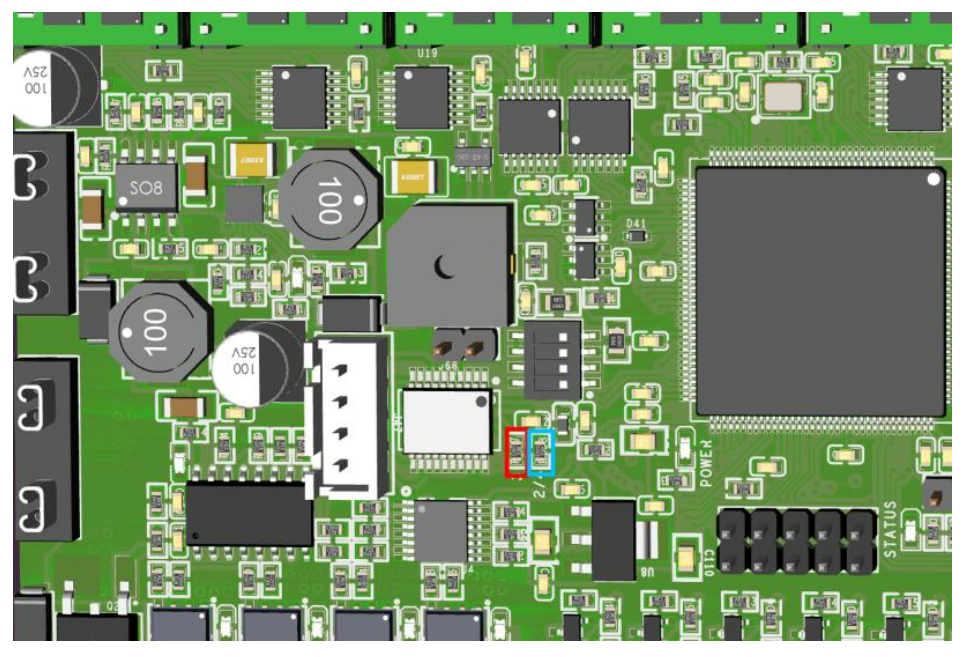
If using a 3 wire PT100, move the resistor from the blue box to the red box as shown below. As the resistor is only 0 ohm, it can be replaced by a solder bridge.

Board.txt modifications
The following lines should be added to the board.txt file.
heat.spiTempSensorChannel = 0
heat.spiTempSensorCSPins = {PF_8}
Config.g changes
PT100
To use the PT100 on your hotend, use the following code in config.g If you are in a country where the mains frequency is 50Hz, change the F60 to F50 (if you don’t know, look here)
M308 S1 P"PF_8" Y"rtd-max31865" F60 R430
PT1000
To use the PT1000 on your hotend, use the following code in config.g If you are in a country where the mains frequency is 50Hz, change the F60 to F50 (if you don’t know, look here)
M308 S1 P"PF_8" Y"rtd-max31865" F60 R430